Skip to content

The Tools We Use.
1. Bending Jig. This one is from MicroMark although any jig will work.
2. Stainless Steel Shears. These are from Xuron, model number 9180et. They will cut metal easily all the way up to our .40mm Phosphor Bronze joint bars.
3. Round tipped pliers. Any brand will work. The smaller the diameter at the end the more versatile the tool will be.
4. Angle tipped pliers. Any brand will work. These are like needle nose pliers but have a 45 degree foot at the end.
5. Flat nosed pliers. Any brand will work. These are excellent at holding the small parts while bending them.
Painting Stainless Steel.
Painting stainless steel is fairly simple. We have always used acrylic paint with all of our models. It is unnecessary to prime stainless steel or phosphor bronze prior to painting with any paint. The additional layer of paint that is put on the metal by priming just obscures detail.
Preparing Models for Etched Parts.
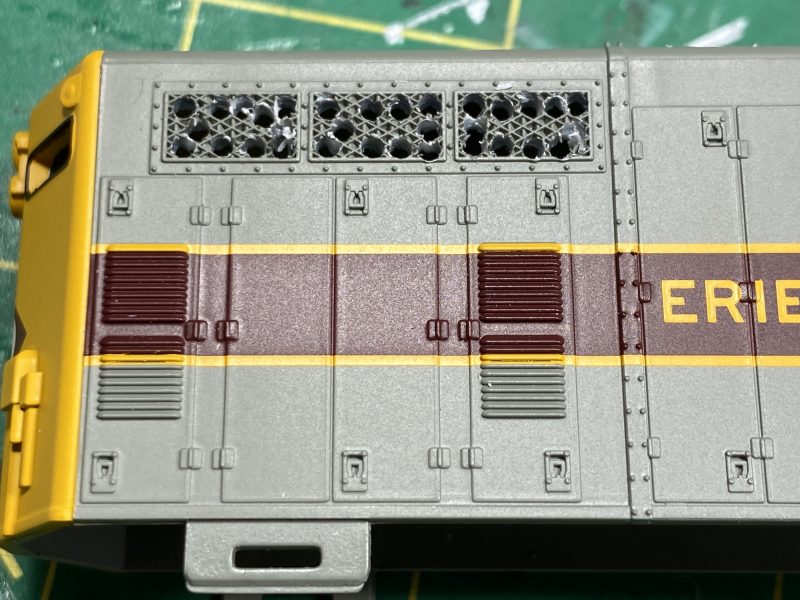
How to cut out the mesh.
The key to doing this properly is to drill many holes on the inside of the frame around the mesh. The more holes you have the less work the X-Acto blade has to do. Once the holes are drilled (using a pin vise) use a new X-Acto blade to cut the material out between the holes. The thinner the material between the holes, the less work the blade has to do. A new blade is necessary as a dull blade will require more force which will lead to more potential for damage to the model or your fingers. One the material is removed you can use the X-Acto blade (if it is still sharp use it, if not replace it) to clean up the inside edge of the frame. Sanding sticks and files are also good for this task.

How to install the front end parts.
The fan, shutters and screen are installed in layers. Think of this as a sandwich. The outer layers (the bread) are the radiator fan and the mesh screen. The inner layer (the meat) is the shutters and the shell. The first part to install is the shutters. These are attached to the inside of the shell with CA. The next part to add is the radiator fan. This is attached to the back face of the shutters on the inside of the shell. This part will be the closest etched part to the trucks gear tower or frame. The last part to install is the mesh screen which is attached to the shell frame on the outside. It is possible to paint the model with the parts installed but it is always recommended to install these parts after they are painted. Painting them while still attached to the fret makes them much easier to handle. A little sidebar about the radiator fan. Notice that the fan does show up because of the dark area inside the shell showing through the open areas around the fan blades. If your fan and shutters are black it makes the details very hard to see. Try painting them a lighter color like a dark grey to make them stand out from the dark void inside the shell. Not many things are worse than adding details that disappear.
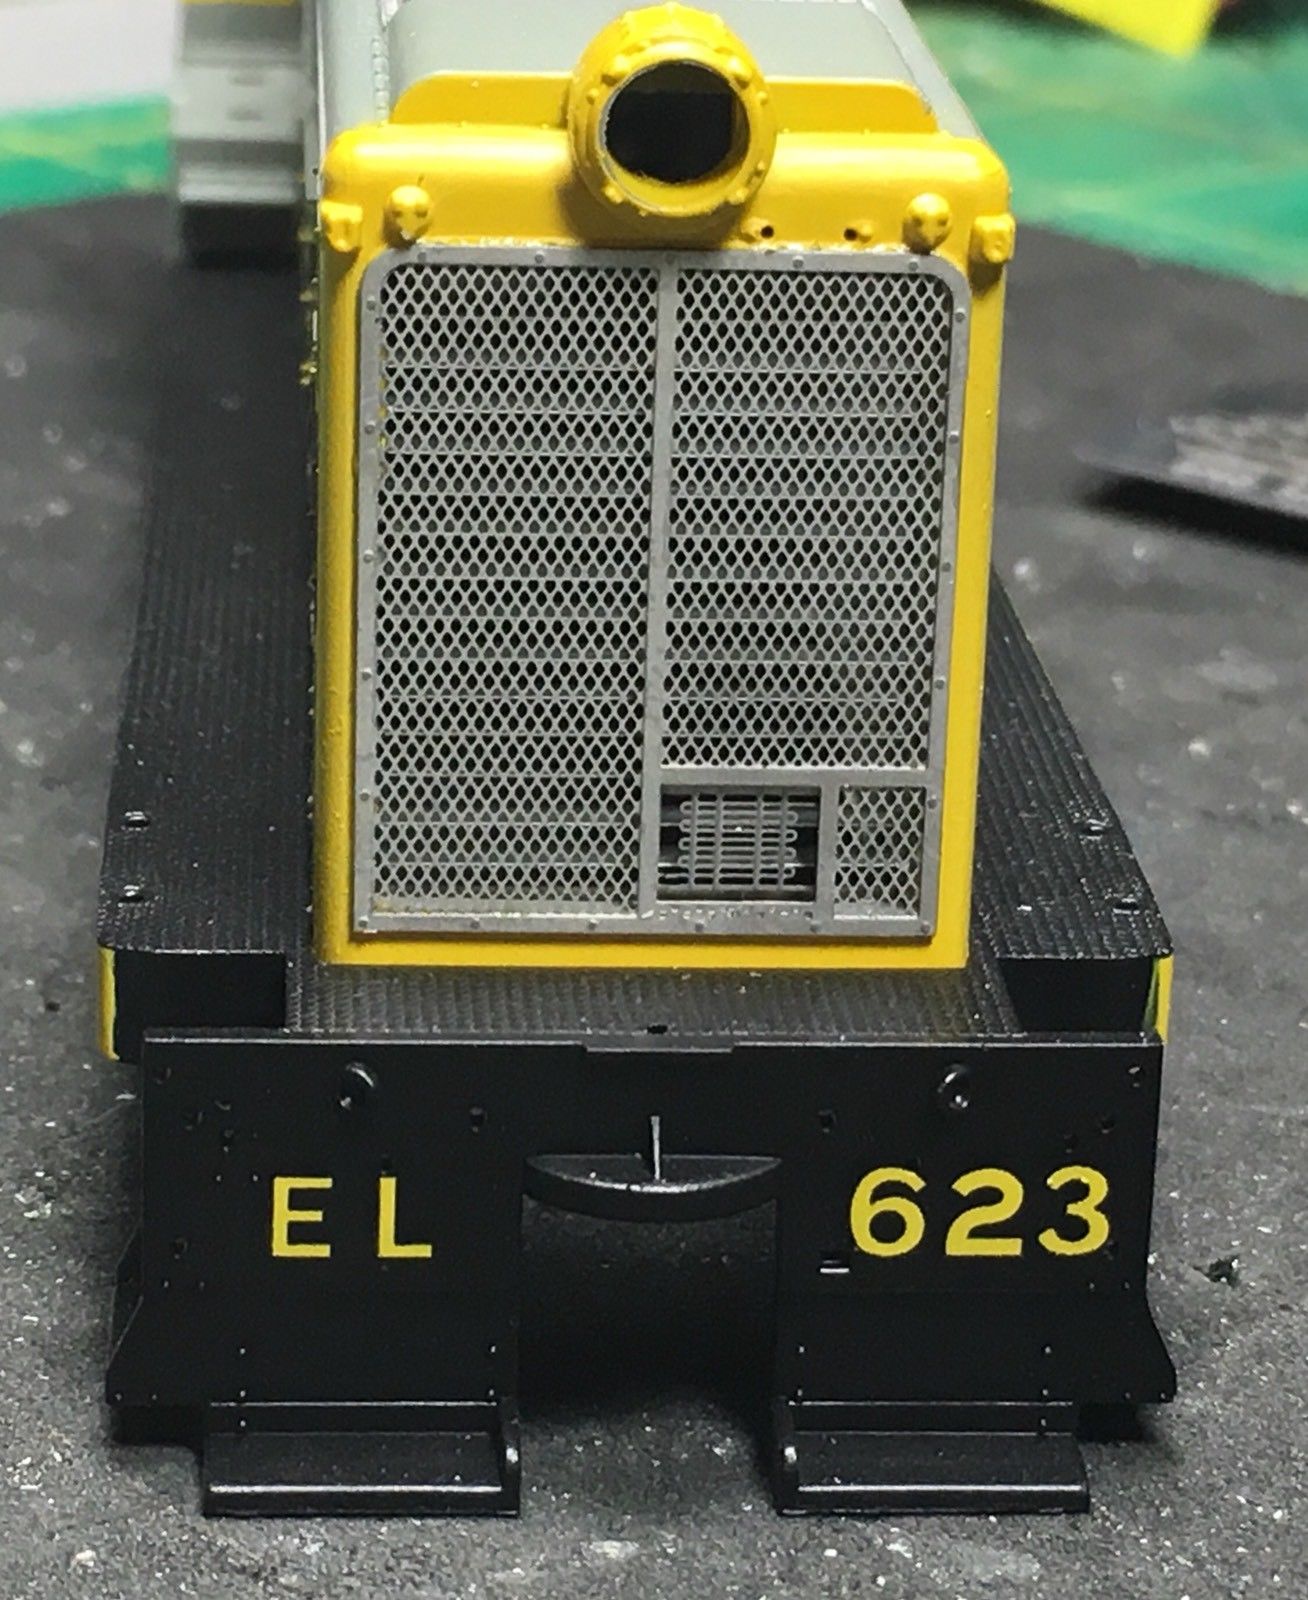
Layers of the front grille.
Etched detail parts are somewhat limited when it comes to the ability to replicate parts with multiple thicknesses. This is true in the case of the front screens on many of the sets offered. Most of our sets have the mesh with full thickness frame surround. The part located next to this piece on the fret is normally the detail piece that is attached to the full thickness surround. The easiest way to attach the overlay is to hold it in a pair of self closing tweezers and apply CA to the inside of the overlay. When placing it on the full thickness frame, start in a corner and drop the surround in place by working your way around the frame. If it doesn’t land properly it is possible to pry the pieces apart and start over. Just scrape the CA off of the parts and repeat the process. Stainless steel is very tough and forgiving when it comes to redoing the process.